Part of any hardware project is the actual hardware - be a circuit board - or project case or mechanical base for a robot. Since I like building small things - and I also sometimes build small robots or other projects that involve some hardware component - I have always struggled building the mechanical pieces to attach motors and gears or enclosures etc. Hopefully this is about to change. After much research and deliberation I have started building a Reprap. More specifically an SAE Prusa Mendel variant. I chose these because I think this will give me the most flexibility at the absolute lowest cost. Once this is operational I plan on using it to print out robot platforms - front panels - or small hardware pieces to attach servos or other parts onto frames or anything else I can think of. Finally I really want to try and see if it could be used as a pick and place machine - or perhaps find other uses for manufacturing small parts I have.
So far I have finished most of the mechanical construction. Off the top of my head - the parts have come from many different sources. And I have built all my own custom electronics. This was because I already had custom motor drive electronics to use for this project, I wanted to be flexible with my control electronics as my drives are capable of doing 200microstep/step which requires much faster processors to run the motors - (which i will hopefully upgrade to some kind of arm in the future) And I am powering everything off 24V instead of the normal 12V for the standard reprap devices.
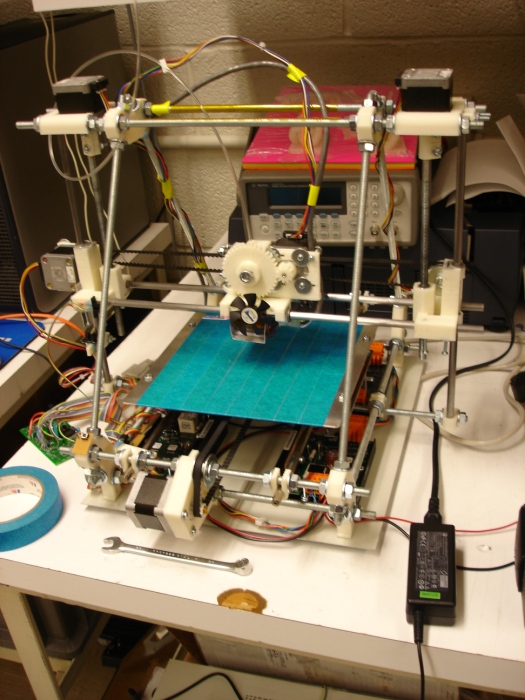
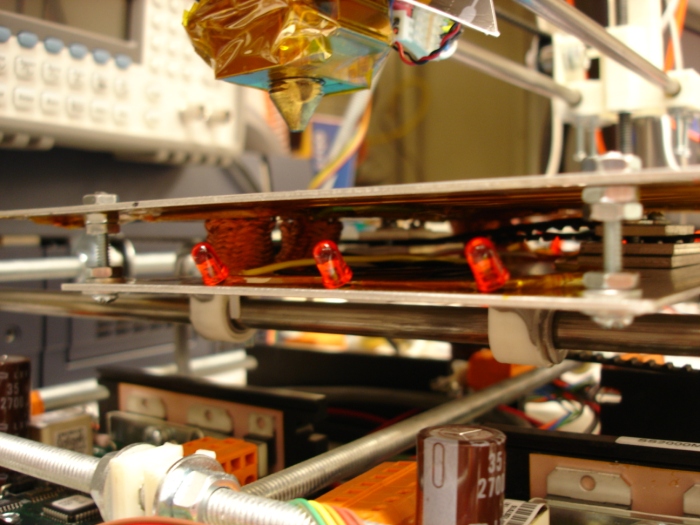
The overall prusa mendel
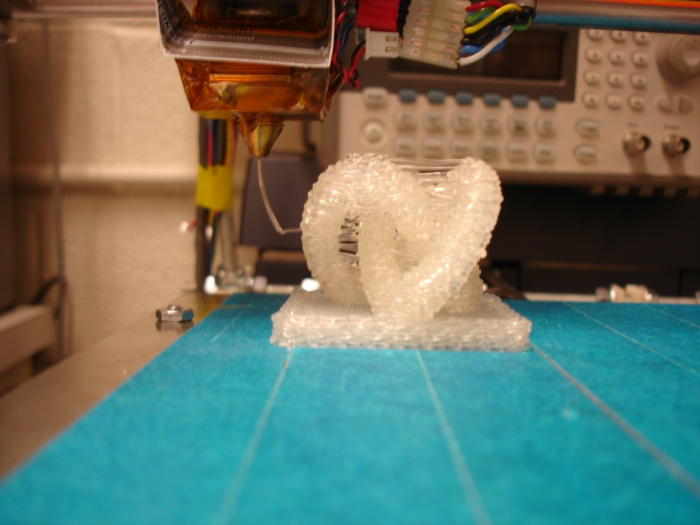
Printing a Knot scupture with a 1mm tip size
My Quick removable heated bed - no wires to disconnect
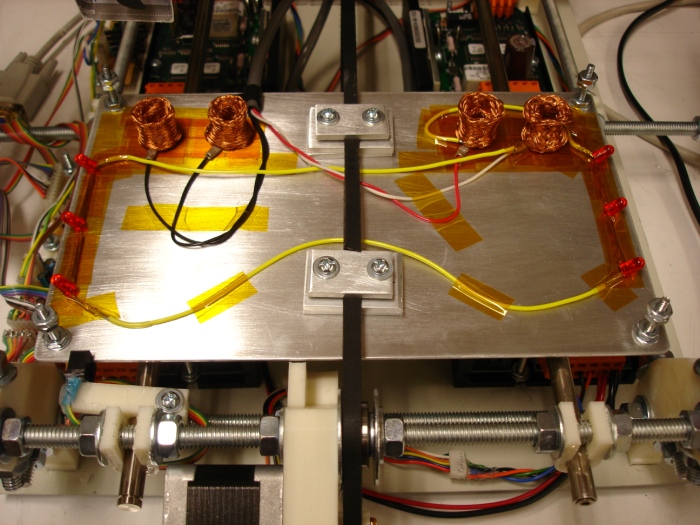
The base that attaches to the build platform showing the springy copper wire connectors to attach everything together
Some Danger LED's to show me when the build platform is on
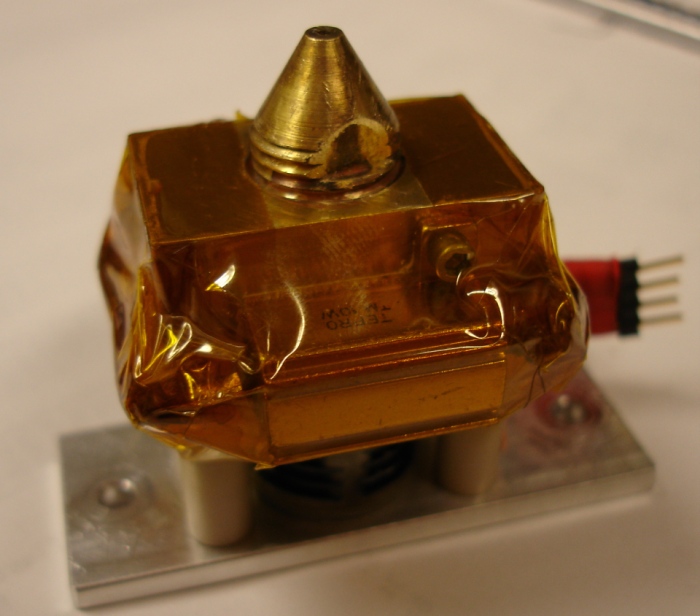
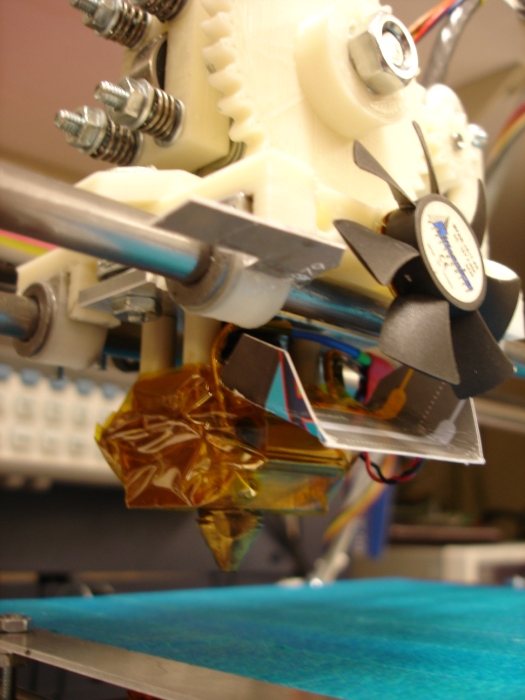
My custom extruder - copper block with two power resistors mounted on - separated from the aluminum plate by 4 delron tubes as a heat barrier as well as a custom heatsink block made with a circular heatsink around the PTFE tube in the middle
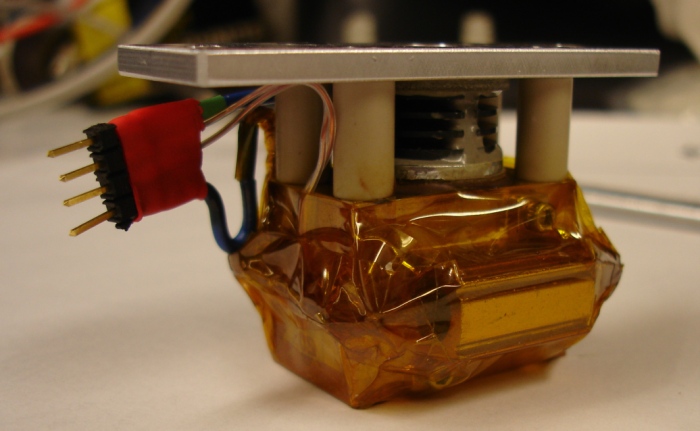
A better view showing the heatsink which I blow air across the top to create a nice thermal bridge between the hot end and the cool AL mounting bracket. The block has a hole drilled for a heatsink - and the center is drilled out to pressfit a 1/4OD PTFE tube down the middle
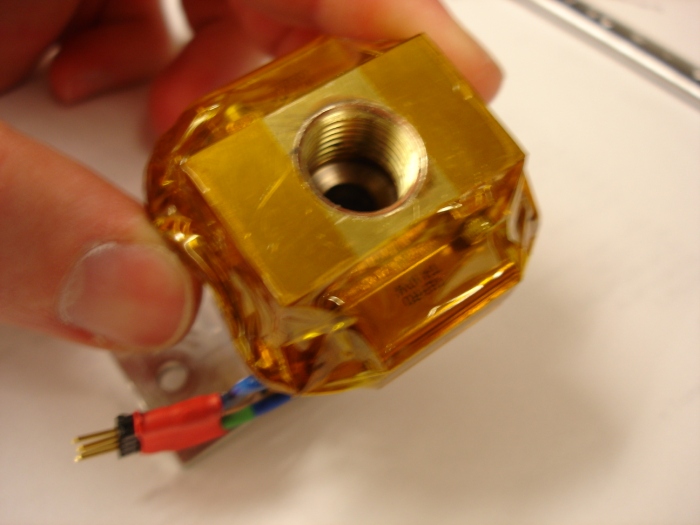
The other side of the block has a tapped hole for interchangeable heads - so far I have a 1mm and 0.5mm head.
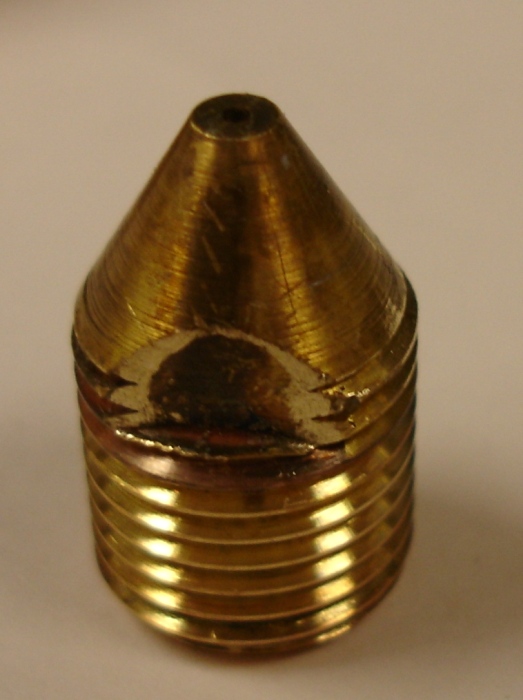
The actual extruder head
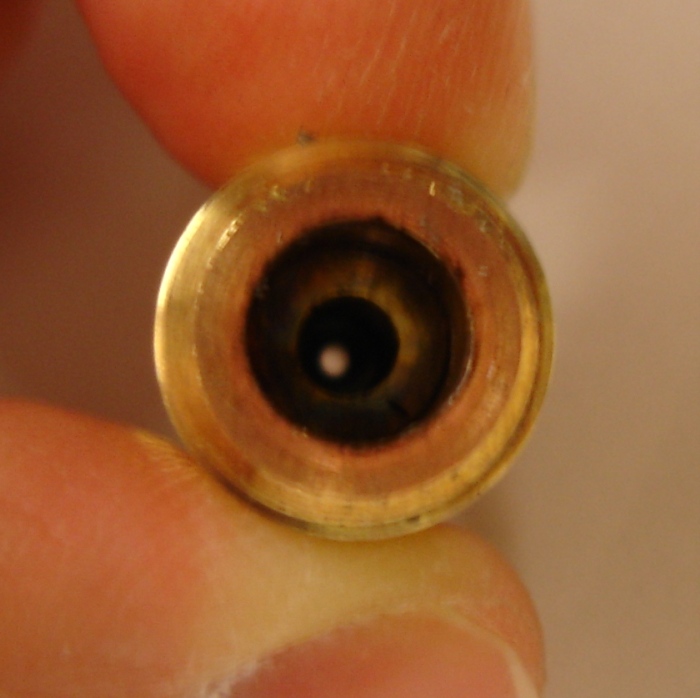
The Extruder head is partly drilled out inside to allow the PTFE tube to fit down inside - thus pressure inside the PTFE tube presses it out against the inside sealing the melt inside the font of the head preventing hot goop from getting everywhere and sticking to the threads
Mounted on the bottom of the X carriage with a Wades extruder on top.
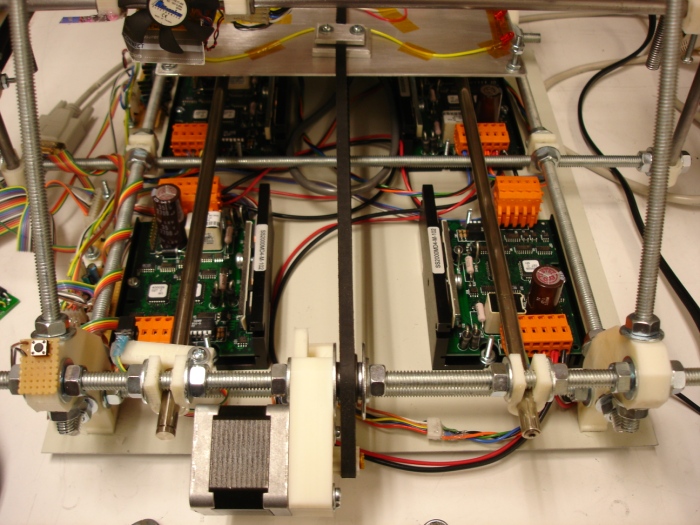
The bottom holds all the motor drives and some interface boards to connect everything to an ATMEGA 328 running Teacup
So far my list of suppliers for all my parts is as follows:
Nuts/Bolts/threaded rod/plain steel rod/washers - local hardware store
Repraped frame parts and extruder parts - ebay seller (search for "prusa mendel")
Stepper Motors (Again Ebay - I purchased 4 motors for 38 dollars with shipping) 48oz/in torque
Extruder tip - custom made using power resistors mounted to brass block and threaded tip - with teflon tube from mcmaster (if you get tube with 1/8id - 1/4od the inner diameter is perfect for sliding 3mm filament through the middle)
Drive motors - custom 24V microstepping motor drive boards
Control electronics - scavanged from printers/school for endstops - and small parts.
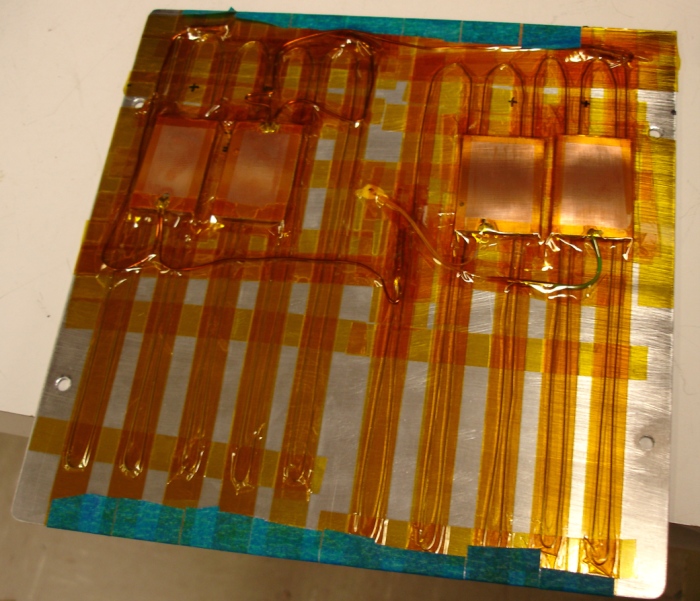
Heated bed - made from nichrome wire taped to aluminum bed using kapton tape. Custom heated bed connector with easy removal feature.
Kapton tape - mcmaster - dont skimp buy the big roll the first time. 1/4in width
Control - right now a freeduino - hopefully soon i will get money and time to port everything over to some kind of an arm. Currently I like the looks of the Mbed or maple based hardware.
bushings - mcmaster